Everyone has their own way of doing things -
but some are harder than others. Some have come up with ideas for making
those harder things easier.
This page is a collection of those things
which can make your modeling easier to do. It is a contributor's
page.
Anyone
with a good idea for simplifying the routine tasks involved in
modeling, or has found a tool or a problem solution which makes work
easier, or has found a source for supplies which are hard to find, is
welcome to send it in. Send in your idea to Webmaster@potomac-nmra.org
The
other day while I was running trains, I pulled the battery cover off
of my DT-400 throttle to flip the battery around. When I put it back
on, I apparently didn't get it aligned just right, and one of the
"ears" that hook the cover into the main throttle body broke off.
I e-mailed Digitrax and asked if I could buy a replacement battery
compartment cover for the DT-400. The response I got said that
Digitrax doesn't sell them, but one of their dealers, a company
called DD&B Systems in Ohio, sells them. I called the company,
and I spoke with a very nice gentleman named Bob Chapman. He said he
sells the covers for $12.00 each, which includes shipping. Address
is DD&B Systems, 10521 Adams Road, Galena, Ohio 43021-9572.
(updated 2/4/2024) Phone is 614-214-0990 and e-mail is bobchap47@outlook.com
How
often do we find ourselves working on a model with miniature (nay!
minute) parts,such as tiny screws, nuts, springs, etc.? And how
often does that small screw you just loosened up or are trying to
start into a thread suddenly fall out of the engine or car onto the
workbench, and then somewhere such that you will never see it again
(or at least until after you give up looking for it and drive to the
hobby shop and buy a pack of screws even though you only needed
one)?
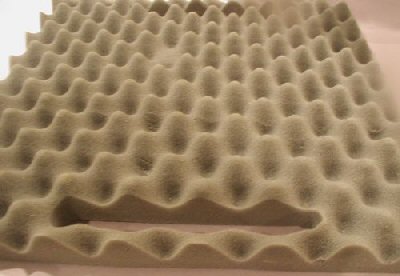
One
way to reduce the probability of this happening is to work
over a piece of packaging foam rubber. Many products,
especially those that are fragile, come packaged with foam
rubber packing. I'm talking about the packing that has hills
and valleys in it, spaced about an inch or so apart. Working
over a piece of foam
like this has two advantages: one is that if you are working
on a fragile or delicate model, the foam provides a soft
cushion to set the model on, and 2.) when you do drop that
small part, there is a high likelihood it will fall into one
of the depressions in the foam and stay there.
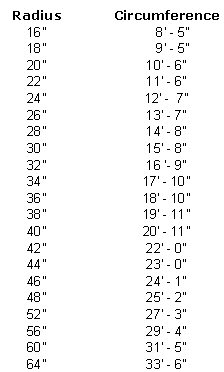
There are lots of instances in the planning and construction
of a model railroad where it would be handy to convert a known
radius curve into a linear distance along that curve.
This table converts often used radii to the full circle
circumference that would be described by that radius. We
more frequently use quarter circle or half circles in our
planning, so it will be necessary to divide each part (feet,
inches) by 4 or 2 as appropriate being careful to convert any
fractional remainders to inches and not decimals.
With Scott Perry's generous permission, his article listing
100 details you may have missed that was published in the
Jan-Feb 2006 MER Local has been extracted and posted
HERE as a
permanent reference
And speaking of
small parts, how many times have you had to get that micro-sized screw
started in a hole you could hardly see? Yes, they make special
screwdrivers that are supposed to hold screws in the screwdriver blade
so you can start the screw. However, I have found they don?t always
work well, especially with very small screws, and small screws with
Phillips head slots. A trick I often use is to dab the tip of the
screwdriver into a tin of soldering paste I keep on my workbench. The
soldering paste is just sticky enough to hold the small screw on the
end of the screwdriver while you maneuver the screw into position and
get it started, Once the screw is started, the screwdriver easily
pulls out of the screw slot. For you auto mechanics, axle grease will
work equally as well.
There have been countless
articles written on weathering methods for rolling stock and structures,
with each method having its own degree of complexity or difficultly, and
each with its own results. I've tried many of these methods, and the one
I like most also turns out to be quick and easy and gives, what I think,
are excellent results. It is a set of weathering pastels from Bragdon
Enterprises (figure 1). I purchased mine at Mainline Hobbies in Blue
Ridge, PA, a short ride north of Frederick, MD. It cost around $11 for a
set of four different pastel colors. The set shown in figure 1 is the
rust-tone set, which consists of 4 different rust-tone shades, and a
plastic, divided container to hold the powders. They also make a
dust-tone set with various shades of gray pastels. "What is so
special about weathering pastels"? you might say. What is different
about these is that once you put these pastels on, you do not need to
set them with a flat overspray. They will adhere like a paint, and don't
come off in your hands.
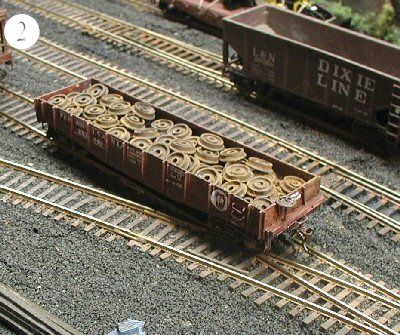
To apply them, I simply dip a stiff-bristled artist's paint brush about
1/4" wide into the pastel powder, and then brush it on the area I want
to weather. I start with a light coat, and then just add more until I
get the desired amount of weathering. I use various rust shades on the
trucks and wheels, around the angle irons on a wooden-sided gondola, and
on the underbody brake detail. Figure 2 shows how I weathered a gondola
load of wheels using the Bragdon Industries Pastels.
Despite your valiant attempts to hang on to that small screw, they
sometimes drop and hit the floor. Have you ever knocked that box
of wood screws you were using to build benchwork on the floor? Or,
if you are like me, knocked over that container of small track
spikes and sent them all over the floor? A small magnet on a
telescoping handle (see figure) is a real timesaver when trying to
pick up these small parts. I found mine at a tool sale at an auto
show. However, they are sold in most auto supply stores, and I
imagine some hobby shops would carry them too. They can also reach
under those hard-to-get-at places that Murphy's law says is where
all dropped parts will end up.
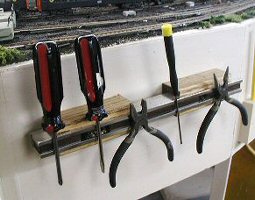
If you work in an office,
you will know that the spring-loaded paper clips are a staple (no
pun intended)of the paper-pusher. However, these paper clips also
make good, small clamps for holding small pieces in place and
under pressure while glue dries. Also, did you ever have to glue
something and hold it in place or keep pressure on it that was in
an interior location? Small welding clamps may be the solution.
These can reach in and clamp your work in that hard to reach spot.
The adjustment screw on the end of the handle allows the width of
the jaw opening to be adjusted to fit the width of the work you
want to clamp, and also the locking pressure on the work when the
jaws are closed. I also found these at an auto show, but any place
that sells welding supplies should carry them.
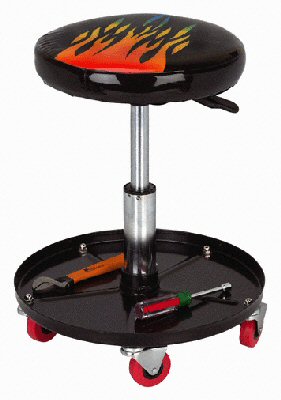
Harbor Freight Tools has a rolling seat
for $29.99. It is about 15" off the ground, rolls on 4
caster wheels, has a cushioned seat and a tray under the seat to
hold tools, screws, etc. and seems ideal for working under the
layout (wiring, installing switch machines, etc.). I just bought
one because I'm installing some under-the-table switch machines,
and got tired of getting up and down all the time.
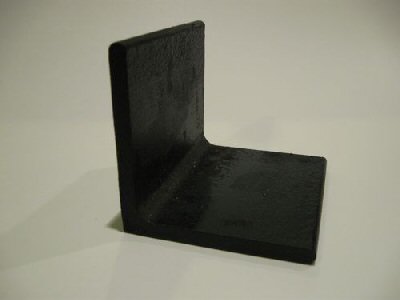
I
have found numerous times that I need fairly heavy weights instead
of clamps to hold some some model pieces together while the glue
dries. Also, when you are gluing the walls on that
building you are making, you want to make sure they are at a 90
degree angle with the base. One way is to buy professional
modeler?s angle plates. However, these are fairly expensive (a 3"
x 3" x 3" plate in the latest Micromark catalog is $27.15 ). I
took a trip up to the local welding shop in our community and
found 5 pieces of about 5" x 5" angle iron cut in
about 3" lengths for which I paid a total of $10. I found a can of
Rustoleum Spray in my garage, and soon had 5 good-looking pieces
of metal that could be used for gluing weights or even angle
plates. I also have an assortment of small pieces of metal
bar stock I got at the welding shop that serve well as gluing
weights.
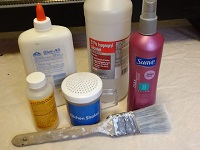
Gluing plastic model kits together usually involves using a liquid
plastic solvent glue, such as Plastruct or Testors. This requires
brushing the glue on with the applicator brush that is attached to
the jar lid. For some applications, this method of application works
fine. However, when you want to either cover a large area quickly or run
a bead of glue down a seam or wall joint, I found that a syringe bottle
sold in hobby stores works wonderfully. Running a thin bead of glue down
a seam, where two walls join, a wall and a base, etc., puts the glue
exactly where you want it. Capillary action draws the glue into the
joint and results in a tight bond without excess glue. The picture is of
a typical syringe bottle.
Do you sometimes need to glue joints, such as butt joints or other
joints which require holding them in place while the glue dries, and
which glue is likely to ooze out onto the surface they are laying on?
When the glue dries, you find you?ve glued the parts not only together,
but also to the table! I keep a roll of wax paper in the drawer next to
my work bench. Whenever I have to glue up something in which glue could
ooze out and glue my work to the workbench, I rip off aa piece of wax
paper and lay it on the workbench, then glue my work on top of the wax
paper. Most glues will not stick to wax paper, so when the glued joint
is dry, just pick up the work and peel off the wax paper. Any residual
glue that is left on the work can be scraped off.
Tired of looking for hard to find hardware and when you do so you have
to pay a high price. Micro Fasteners offers a solution for your
needs. They offer a large assortment of hardware fasteners and
drill bits that will meet your needs. The unit price is
extremely reasonable although shipping is a minimum of $8. I
have used them in the past and found their products and service highly
acceptable . I especially use their Pan Head Sheet Metal Screw PN
SMPP0204 (100 pieces for $2.75) for attaching trucks to the under body
of my rolling stock. This screw is a lot better than the ones
provided and is a self tapping screw which secures the truck better
than the original manufacturer. If you have experiences the loss
of the pins from some manufacturer provide for securing the truck
you?ll find this alternative will eliminate that problem.
Go to their website and you can request a catalog sent to you via
email. http://www.microfasteners.com
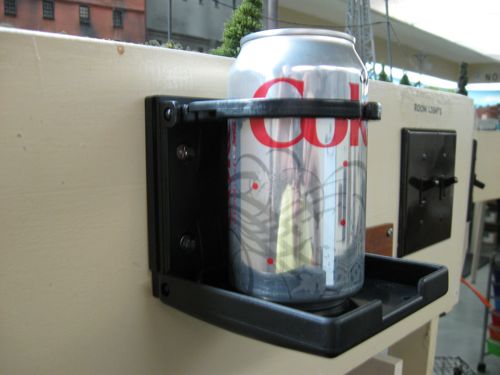
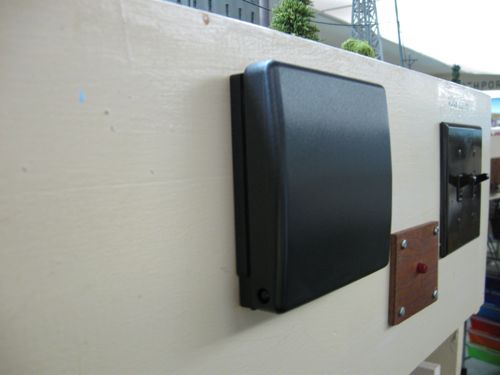
During an operating
session, many of the "crew" will have a beverage with them.
The last thing you want is for them to put it on the layout while
they are busy switching a yard, or flipping turnouts to route their
through freight. One bump and you may kiss goodbye to some scenery,
a structure, or even short out the railroad. This holds true for me
too, when I am working on the layout. While there are many
commercial drink holders, those that are mounted to and stick out
from the front of the layout can be a problem. People will walk into
them or snag them when trying to pass a fellow operator in an
aisle. To eliminate this problem, there are drink holders made
for boaters that fold up out of the way when not in use. I purchased
mine at a local West Marine dealer. They cost about $10 each, so
they aren?t all that cheap. However, I find them well worth the
investment. When an operator finishes up his chores in one area of
the layout, and moves with his train to another area, he simply
grabs his can or bottle and flips the drink holder closed . When it
is closed it sticks out no more that about 1/2? from the front of
the layout and poses no hazard to traffic in the aisles.
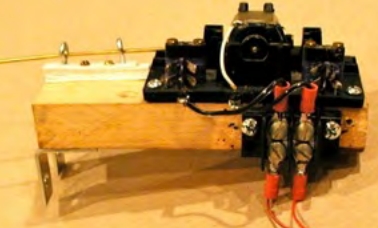
I you have a
Soundtraxx DSD-LC or DSX Sound Decoder installed in one of your
locomotives and have experienced the annoying restart or recycle of
sound system, there is a way to eliminate this. Soundtraxx has
a Stay Alive capacitor. This capacitor maintains electrical path to
the sound unit when your engine experiences a loss of electrical
path between rails and sound decoder. Installation of the
capacitor is straight forward and simple. Ensure the plus and
negative leads are connected properly or will not work.
The two attached documents (PDFs below) will offer further
assistance on the installation procedure.
I've used this capacitor on two of my engines and the problem was
eliminated.
Soundtraxx offers the stay alive capacitor or you can purchase the
capacitor from:
Radio Shack. Their P/N #272-1029.
Digi-Key P/N P10271-ND (25V 220uf) at $0.48 each
Digi-Key P/N P10275-ND (25V 470uf) at $0.73 each
Soundtraxx information sheets: Soundtraxx DSD-LC
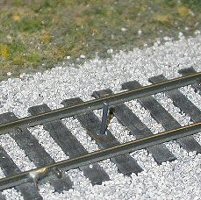
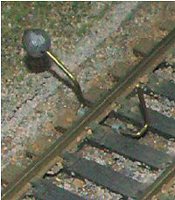
During a layout visit at the MER
Convention in Princeton, NJ, I noticed a neat, simple way the layout
owner used to indicate turnout direction and also to grab the
throw bar for hand-thrown turnouts that use hand throws such as
those made by Caboose Industries.
First, tack a small nail or brad with a flat head into the layout
table on both sides of the turnout throw, and locate them so the
flat end of the throw bar will rest on the nail head when thrown.
This will keep the throw bar off the ground and easy to grasp when
you want to change the turnout's direction.
Second, paint the top of one of the small nails or brads red, and
the top of the remaining one green. Then paint one side of the throw
bar end red and the other side green. Decide on your color
convention (green showing for when the turnout is aligned to the
mainline, or when the turnout is aligned for the straight direction)
and paint accordingly.
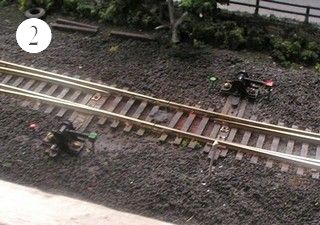
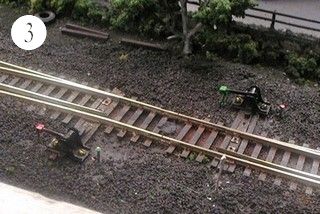
Figure 1 shows a Caboose Industries hand throw with the small
nails/brads in place and painted. Figure 2 shows the turnout thrown
in one direction, and figure 3 shows it thrown in the other
direction.
Swivel Mount and Waist Apron as Third Hands
— Pete LaGuardia
With today's growing interest
in developing layouts for operation the need to manage
paperwork, car cards, and throttles have become a increasing
problem. Below are two solutions which will assist in
managing all this stuff.
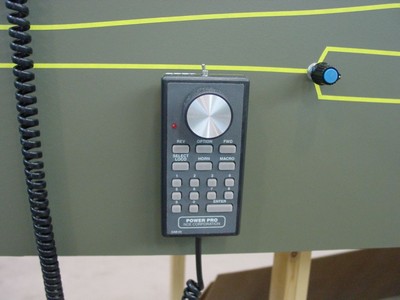
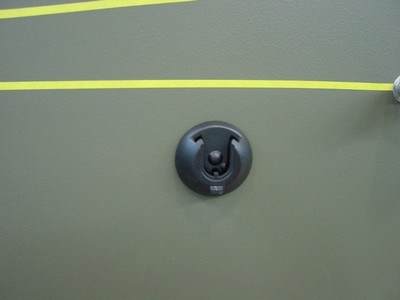
The clip.com
has one solution where you can hang your throttle around the
layout where by freeing your hands. The throttle is attached to
the fascia in a way that you can still control the
direction and speed of your train. These pictures of
the swivel mount give more info on this item.
E-Shirts Plus has developed a
waist apron that can assist in handling those items. This
waist apron can be customized where by choosing a logo of your
choice. The apron is designed with pockets which will hold
your Throttle, Car Cards, Schedule, Pencils and Uncoupling
Tool. I have attached a picture of the apron. You
can contact E-shirts Plus at the following for more info
these aprons: de0147@comcast.net
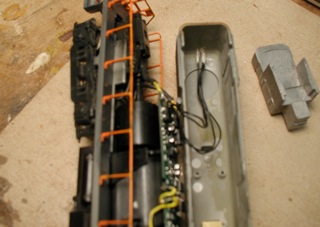
A number of manufacturers make
a decoder that mounts on the motor frame of an Atlas HO
scale RS3 diesel. One of the more painful parts of the
installation is the headlights. The Atlas engines use a
piece of clear plastic to transmit the light from a circuit
board-mounted bulb to the headlights. This circuit board has
to be removed to mount the decoder. Also, the clear plastic
is custom-formed to fit around and under the shell weights.
Hence, to get directional headlights, one usually has to
resort to cutting the clear plastic, trying to glue lamps in
the shell so they fit under the shell weights and will still
transmit light to the headlights. The Atlas RS3 headlight is
actually two smaller headlights located side by side. I
found that Miniatronics 12V/30mA bulbs (Model
18-712-10) are tubular in shape, and the diameter is
approximately the diameter of the headlamp opening. Thus, I
was able to easily glue two of these bulbs in each end of
the shell (one per headlamp opening). They fit within the
opening of the shell weight so no modification to the shell
weight is needed. The wires are then connected in parallel
and soldered to the DCC decoder board.
The Digitrax decoder I used (DH150A) is rated for 1.5 Amps.
An HO motor such as used in an Atlas HO engine shouldn't
draw more than around 0.5 amps. Thus, it can easily handle 2
bulbs at each end of the shell (60 mA), and the headlight is
now really bright because of using 2 rather than 1 bulb per
headlight.
This is a great item — it is a glue pot — it even has a handle to
keep a glue stick in place. I just ordered it for around five
dollars from www.consumercrafts.com — though shipping
was $8. I learned about these from Paul Dolkos; it makes for quick
assembly of a wooden scratchbuilt structure — glue takes to long
to dry. I could not find these at any hobby shop nor at craft
shops. I have used a glue gun to melt glue but I find them very
cumbersome. These pots are surely better. Paul points to it with
pride in a video or a home layout tour — not sure which it was.
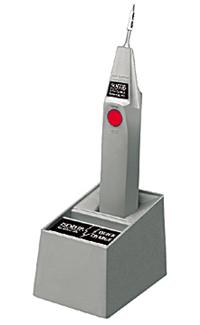
I was perusing the MicroMark
catalog a while ago, and saw that they had a rechargeable
battery powered wireless soldering iron. It is called "Iso-Ti Cordless Soldering Iron" and costs about
$60. Every time I have to go under the benchwork to solder something
(switch machine, track wire connections, building lights, etc.), I
have to drag out an extension cord, pull out the soldering iron and,
if it is a pencil point iron, wait for the tip to heat up, and then if
I set it down, remember not to put my hand on it by mistake since it
is still hot, and also not get tangled up in the electric cord. I was
a little wary at first, because some battery-powered soldering irons
I've tried before did not work well at all.This cordless one works
great. Push the button and the tip is hot in seconds. Take your finger
off the button and it cools right down, No cords. There are 3
different size tips available, depending on what you are soldering. If
you have frequent soldering to do that is under the benchwork, it is
great. I keep it in a charger stand on the workbench, and when I'm
soldering at the workbench, it is easier to reach for it than to pull
out a pencil tip iron and plug it in.
1. Spraying old decals with Testor's Glosscote or Dullcote.
2.
Painting old decals with the decal preservative marketed by Micro-Scale
works as well.
3. Spraying old decals with Testor's Decal Preservative, a product that
a fellow modeler gave to me, works very well.
All methods require that one allow time for the product to dry. All of
the above-named have worked. I model in S and have used some very old
S-scale CHAMP decals, and they have come out fine. I do not advise
applying old decals without application of some product that preserves
them.
I have also found that Micro-Scale decals require extreme care in
application. If the package has been opened or is old, then an
application of some preservative is necessary. Testor's Decal
Preservative has worked best on old Micro-Scale decals I have found.
Nickel-silver track, which is mostly nickel [and
contains no silver - Ed.], forms a surface oxide but the oxide
will conduct electricity, so abrasives are only needed if the track
becomes extremely dirty. Since I?ve allowed that to happen on occasion,
those wet/dry fine sandpaper sponges you can get at paint stores, or the
paint department of Home Depot, work quite well in getting the big stuff
off. Additionally, there was as article (Improve
Performance with Transmission Fluid by Steve Carter, Model
Railroader, May, 2011, p. 58) about a large club on the west coast that
uses Automatic Transmission Fluid to keep their tracks clean. I tried it
and it works but it does have to be cleaned off periodically or it leaves
a mess.
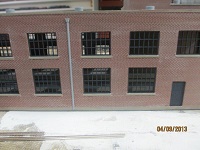
Mortar and Mullions – What To Do? — Pete
LaGuardia
As a model railroad hobbyist, I
was never satisfied using washes, paints and other methods to simulate
mortar joints on brick buildings. No matter what method I used or
saw never really defined the difference between the brick and mortar in a
way that represents a life like appearance.
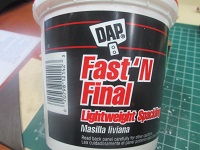
A friend of mine recently mentioned he used DAP— Fast'N Final Lightweight
Spackling to simulate concrete walkways and roads. I tried this and it
worked great. I decided to use the same material to simulate mortar and I
was very pleased with the results. The material is so simple to use I just
rubbed it on the bricks with my thumb which filled in the relief nicely
and gave a great representation how mortar should look. I continued
to rub the bricks with my thumb removed the excess from the brick surface.
Recently, I purchased Walthers Cornerstone Machine Shop ( https://www.walthers.com/exec/productinfo/933-2902)
— low and behold the window panes and mullions were molded into one piece.
Now what? How do I paint the mullions and keep the panes clear?; I came up
with a method first spraying this item with Dull Cote on both sides.; Next
I took a black Sharpie and painted the mullions. Then I applied the window
panes to the building. The overall result was very pleasing and gave me
the results I was looking for. Try it yourself and I believe you will find
it easy to do and happy with the results.
^top
Installing Kadee Couplers on Athearn Locomotives — Bill
Mosteller
The first step is to drill and
tap the coupler tab for a 2-56 screw. Kadee offers a #246
2-56 Tap & Drill Setideal for this purpose. Countersink
a drill starting point in the hole or dimple in the coupler tab. I use a
nail for this, I can never find my countersinks. Then, use the smaller
drill in the set to drill a hole through the tab. Finally, tap the hole
for a 2-56 screw using the provided tap. Work slowly, use oil, and clean
the tap regularly. Repeat on the coupler tab on the other end of the
locomotive.
The next step is to select the right screw for this job. You might
think a 2-56 screw, blade or Phillips head, would be idea, but I'm giving
you a different idea here. Use a Micro-Fasteners Allen (hex) head SCS0204
-2- 56 x 1/4 -Socket Head Cap Screw -Stainless 50 pcs/pkg.
(Pete LaGuardia's article reminded
me of this company.) Mark Castigliano of Branford Hobbies and New
Haven Terminal taught me this. Mark produces custom painted New
Haven locomotives. When I objected that nothing else in the hobby
uses Allen wrenches (so you've got to buy the tool) he pointed out two
benefits: (a) it's harder to mar a
paint finish with an Allen than with either a blade or Phillips
screwdriver, and (b) you can hold the Allen screw on the tool one-handed.
I was sold!
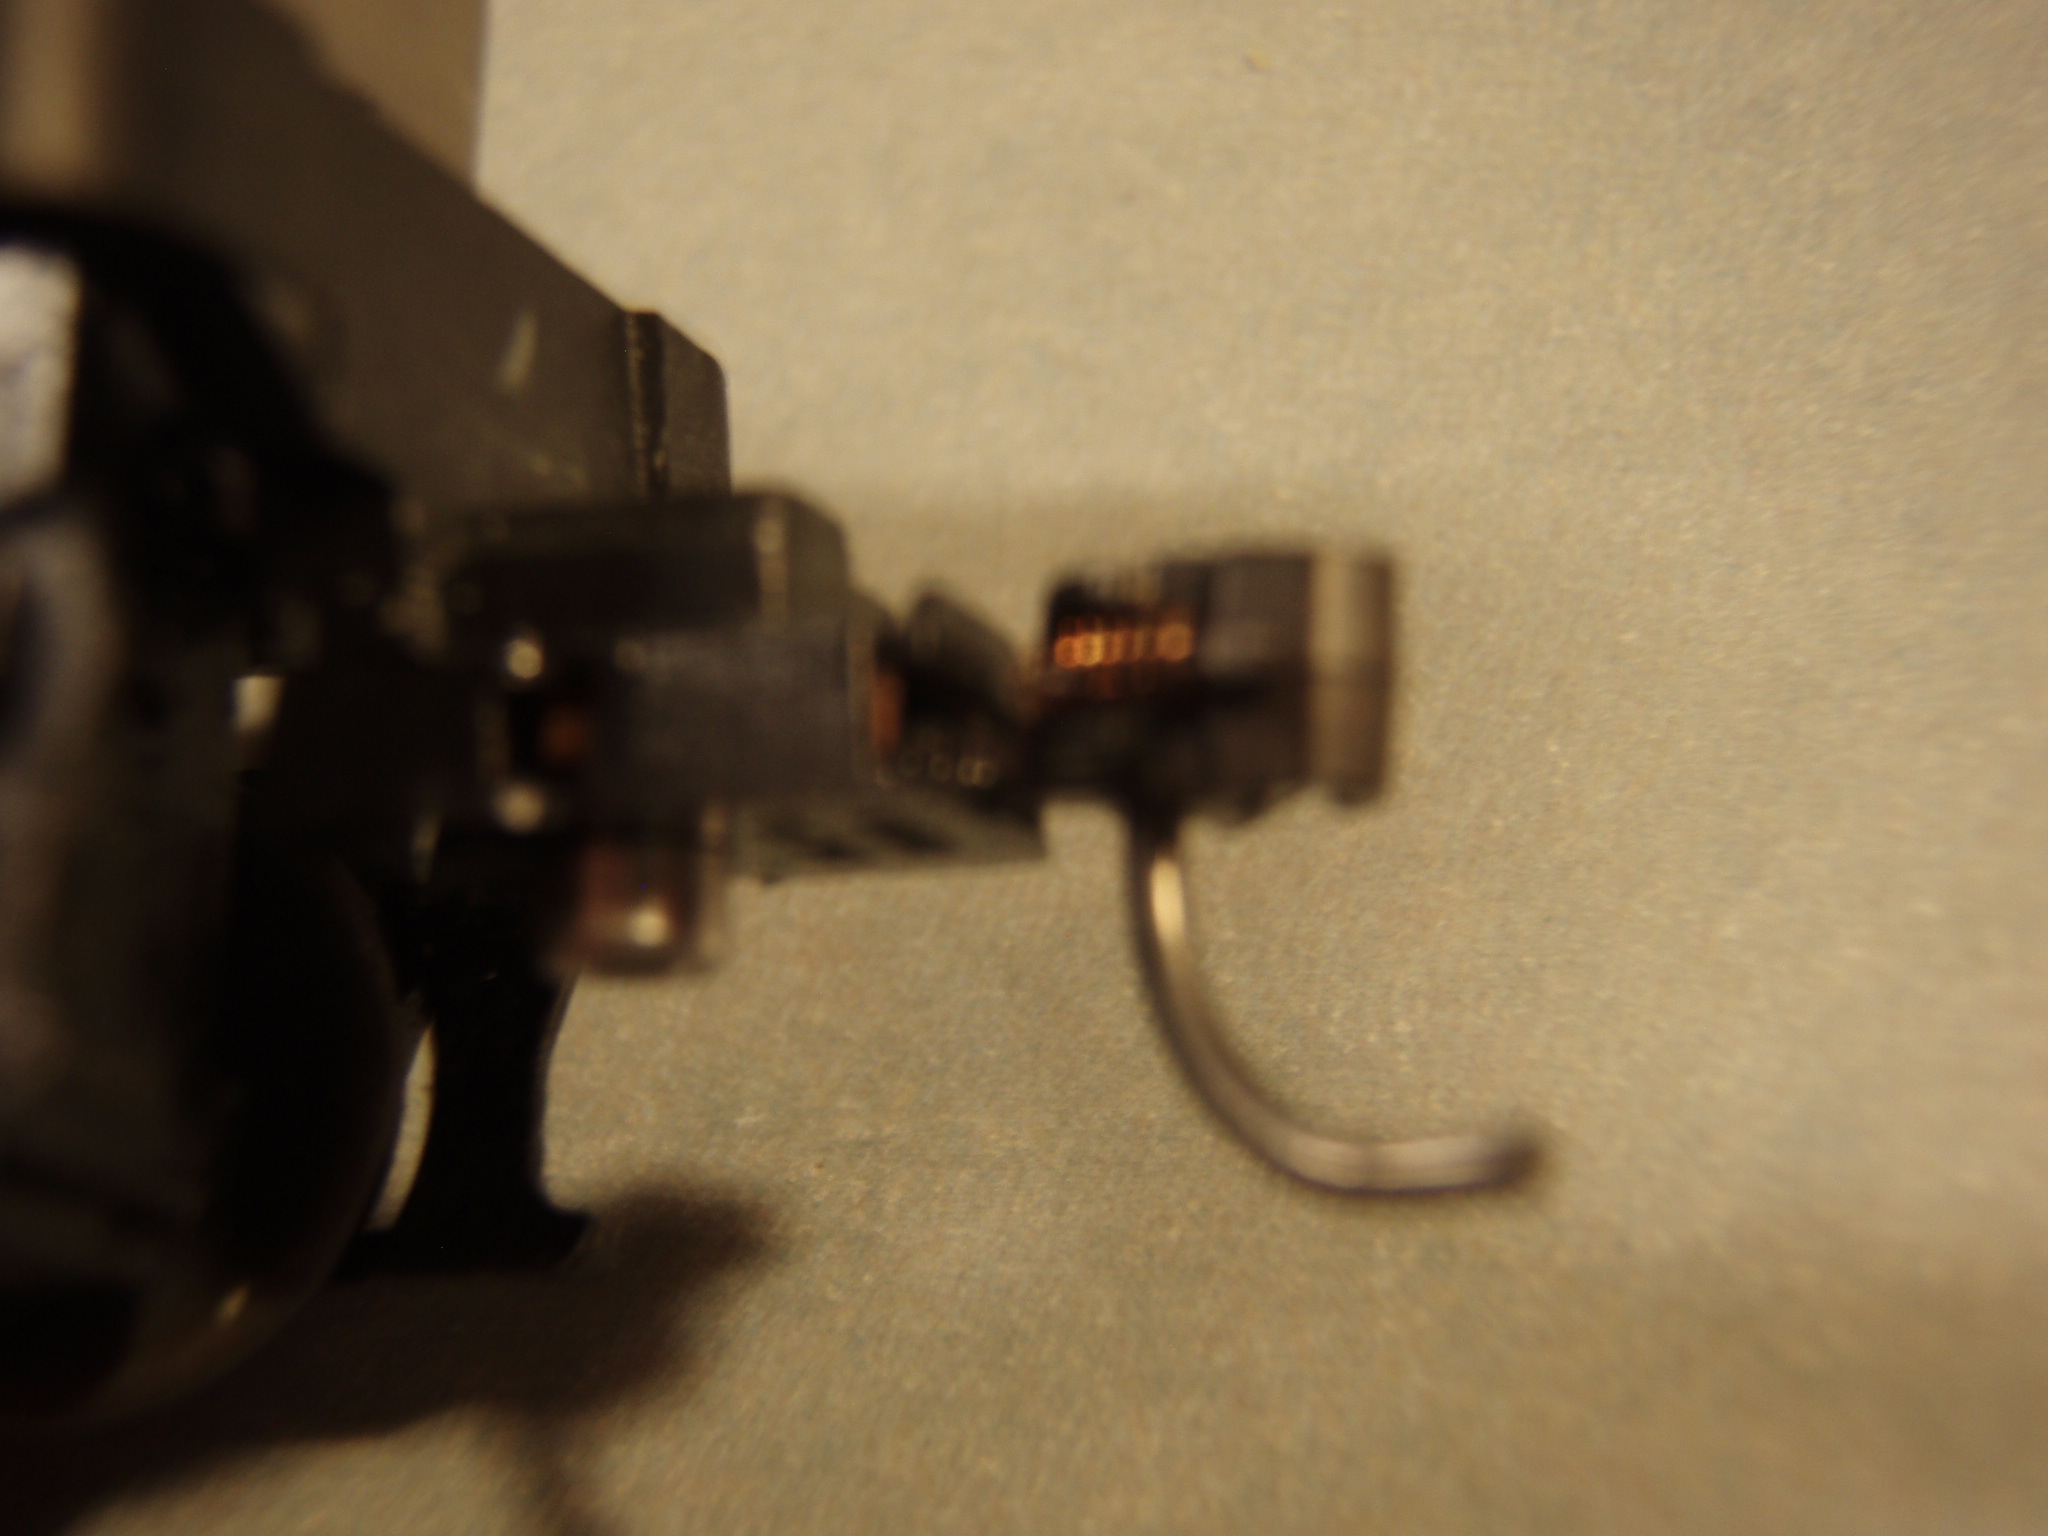
Finally,
screw the Kadee coupler box to the underside of the Athearn coupler
tab. Because the box is mounted under the locomotive's
coupler tab, you'll need a #27 or equivalent to get the coupler height
correct.
We constantly see "how to ballast" advice in articles in magazines
or videos on the web—dump huge quantities of ballast out of a cup or
spoon it onto the track, spread and smooth it with a big brush, and
wet it with squirts from a trigger type spray bottle. Even the
Woodland Scenics video clip on ballasting promotes this outdated
technique. It gives less than optimal results unless one spends much
time and effort taking ballast AWAY from the rail bases and tops of
the ties. There's a better way—apply the ballast in small quantities
and simply stop when it's just right.
Use a "kitchen shaker" to "salt" the
ballast onto the track. I have a dozen shakers (purchased at
Wal-Mart), and I use them to apply fine ground foam for scenery as
well as ballast. You can apply ballast 20 grains at a time with these
shakers, and almost "mist" on fine ground foam. They are transparent,
the size of a coffee cup, have a handle,
and a screw-on top with 100 or so 1/16" inch holes. If you can't find
shakers like that, drill 1/16" holes in the lid of any jar that size—a
cluster of 15 or 20 holes over on one edge will be enough.
1) Fill shaker 1/3 to 1/2 way with
ballast.
2) Tip shaker over at an angle and tap it to sprinkle ballast from
just a few holes at one edge.
3) Fill the spaces between ties without going over the tie tops.
4)
Tap the rails with the handle of a screwdriver or paint brush as you
go. This will cause the ballast to jump off the tops of the ties and
settle it between the ties—a lot quicker than brushing. (This is one
of Brion Boyles' "magic tricks")
That's it—it will seem slower than the
"dump and spread" technique, but it's actually faster.
Some other things that will improve your ballasting.
• Use fine grade ballast in
HO—the medium doesn't look as good.
• Paint cork roadbed the color
of the ballast before laying the track. In addition to allowing a
thinner layer of ballast because of less "see through", the glue
adheres better to the paint.
• Apply straight white glue to the beveled shoulders of the
roadbed with a narrow brush first. That will hold the sprinkled
ballast in place so that you don't apply too much there.
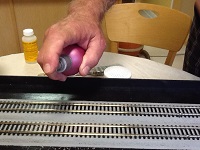
• Use SUPER Wet Water to wet the ballast before applying
dilute white glue. Super wet water is a 50-60% isopropyl alcohol/water
mix with a few drops of Kodak PhotoFlo added. The PhotoFlo is what is
used to get the water to "sheet" off developing photographs, and is
far superior to dishwashing detergent as a surfactant. Between the
alcohol and the PhotoFlo, the water will soak into the ballast
beautifully. (This is a "magic trick" garnered from an N-Tracker at
the Greenberg show in Norcross GA whose modules had the best
ballasting job I have ever seen).
• Ditch the squeeze trigger spray bottle and get some empty
hair spray bottles from some friendly female. It takes longer to wet
the ballast with one since it sprays a mist, but you will avoid the
occasional "water bomb" droplets that you get from trigger bottles—the
craters the water bombs leave are impossible to fix.
• Make absolutely sure you have completely soaked the
ballast with the super wet water before applying glue—that's the most
important step.
• 50-50 diluted Elmer's is
adequate for gluing the ballast, and adding some alcohol and detergent
to it helps.
• Use an old Elmer's spout top bottle to apply the diluted
glue. Run it along the inside and outside of each rail, holding the
spout up under the rail head—let the glue run over the rail base and
soak into the ballast. Do this until white puddles form in the ditches
and between the ties in the center of the track.
• Let it dry for a couple of days and scrub the tie tops and
rail bases with an old toothbrush. That will remove nearly all stray
bits of ballast. A bright boy will remove glue residue from the tops of
the rails
• It goes without saying that you should take some leftover
track and roadbed, make up a little "layout", and practice on that
first.
An elegant, dispatcher-free solution for granting a train "occupancy
rights" to a track section.
—
The ARE uses "track warrants" for single track sections. The
warrant cards hang on a hook for the engineer to pick up. Warrants
were introduced to prevent two trains entering a single track
district in opposite directions. Possession of the warrant grants
permission to occupy the district. This prevents collisions. Making
the warrant "self service" for the engineer reduces the number of
interruptions for the dispatcher. In prototype usage the scheme of
obtaining, holding, and returning the warrant was called a "staff"
or "baton" system. In today's Information Technology the warrant
might be called a "token."
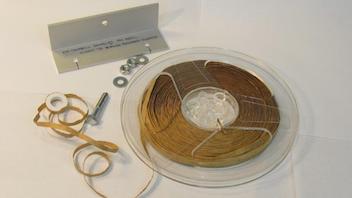
Easy To Make Holder For Campbell Shingles —
John Paganoni
Campbell shingles look great on model structures either as roofing or
siding; however, when you break the package open, the roll of shingles is
hard to keep organized and when the job is done re-rolling those things is
a hassle. A holder with a reel can save a lot of time and frustration when
cutting lengths of shingles and then having a way to neatly put them away
until the next time they are needed. The picture shows the parts needed to
make a tool that can be clamped to the edge of the workbench. The main
item is a reel from an old tape recorder. This one held the entire
Campbell shingle roll neatly. The bolt, washers and nuts serve as an axle
for the reel. The aluminum angle stock (the one shown is 1 1/2" stock,
1/8" thick, 5" long) was drilled for a 1/4" bolt and attached directly to
the workbench. A longer piece would be necessary for just clamping to the
bench.
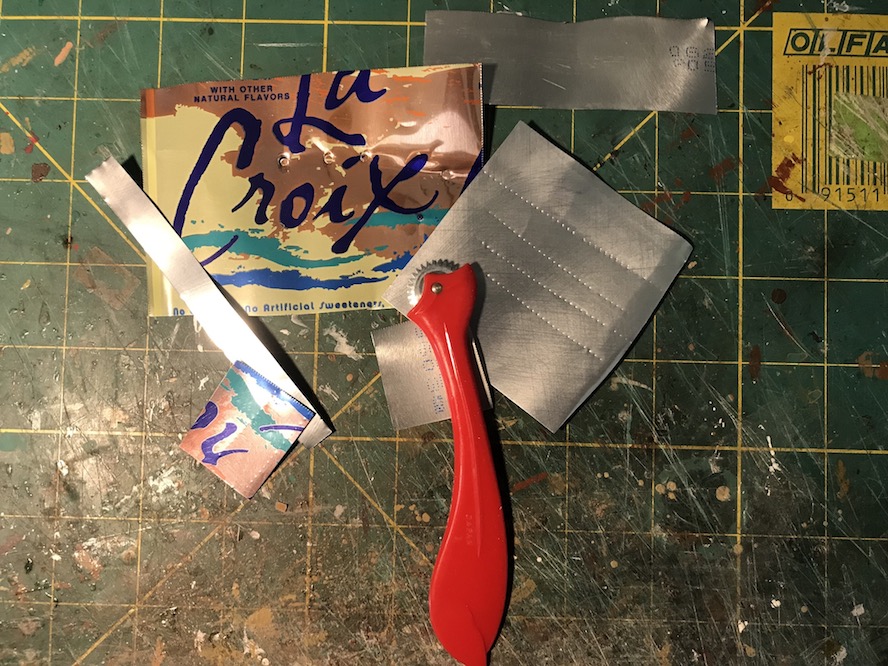
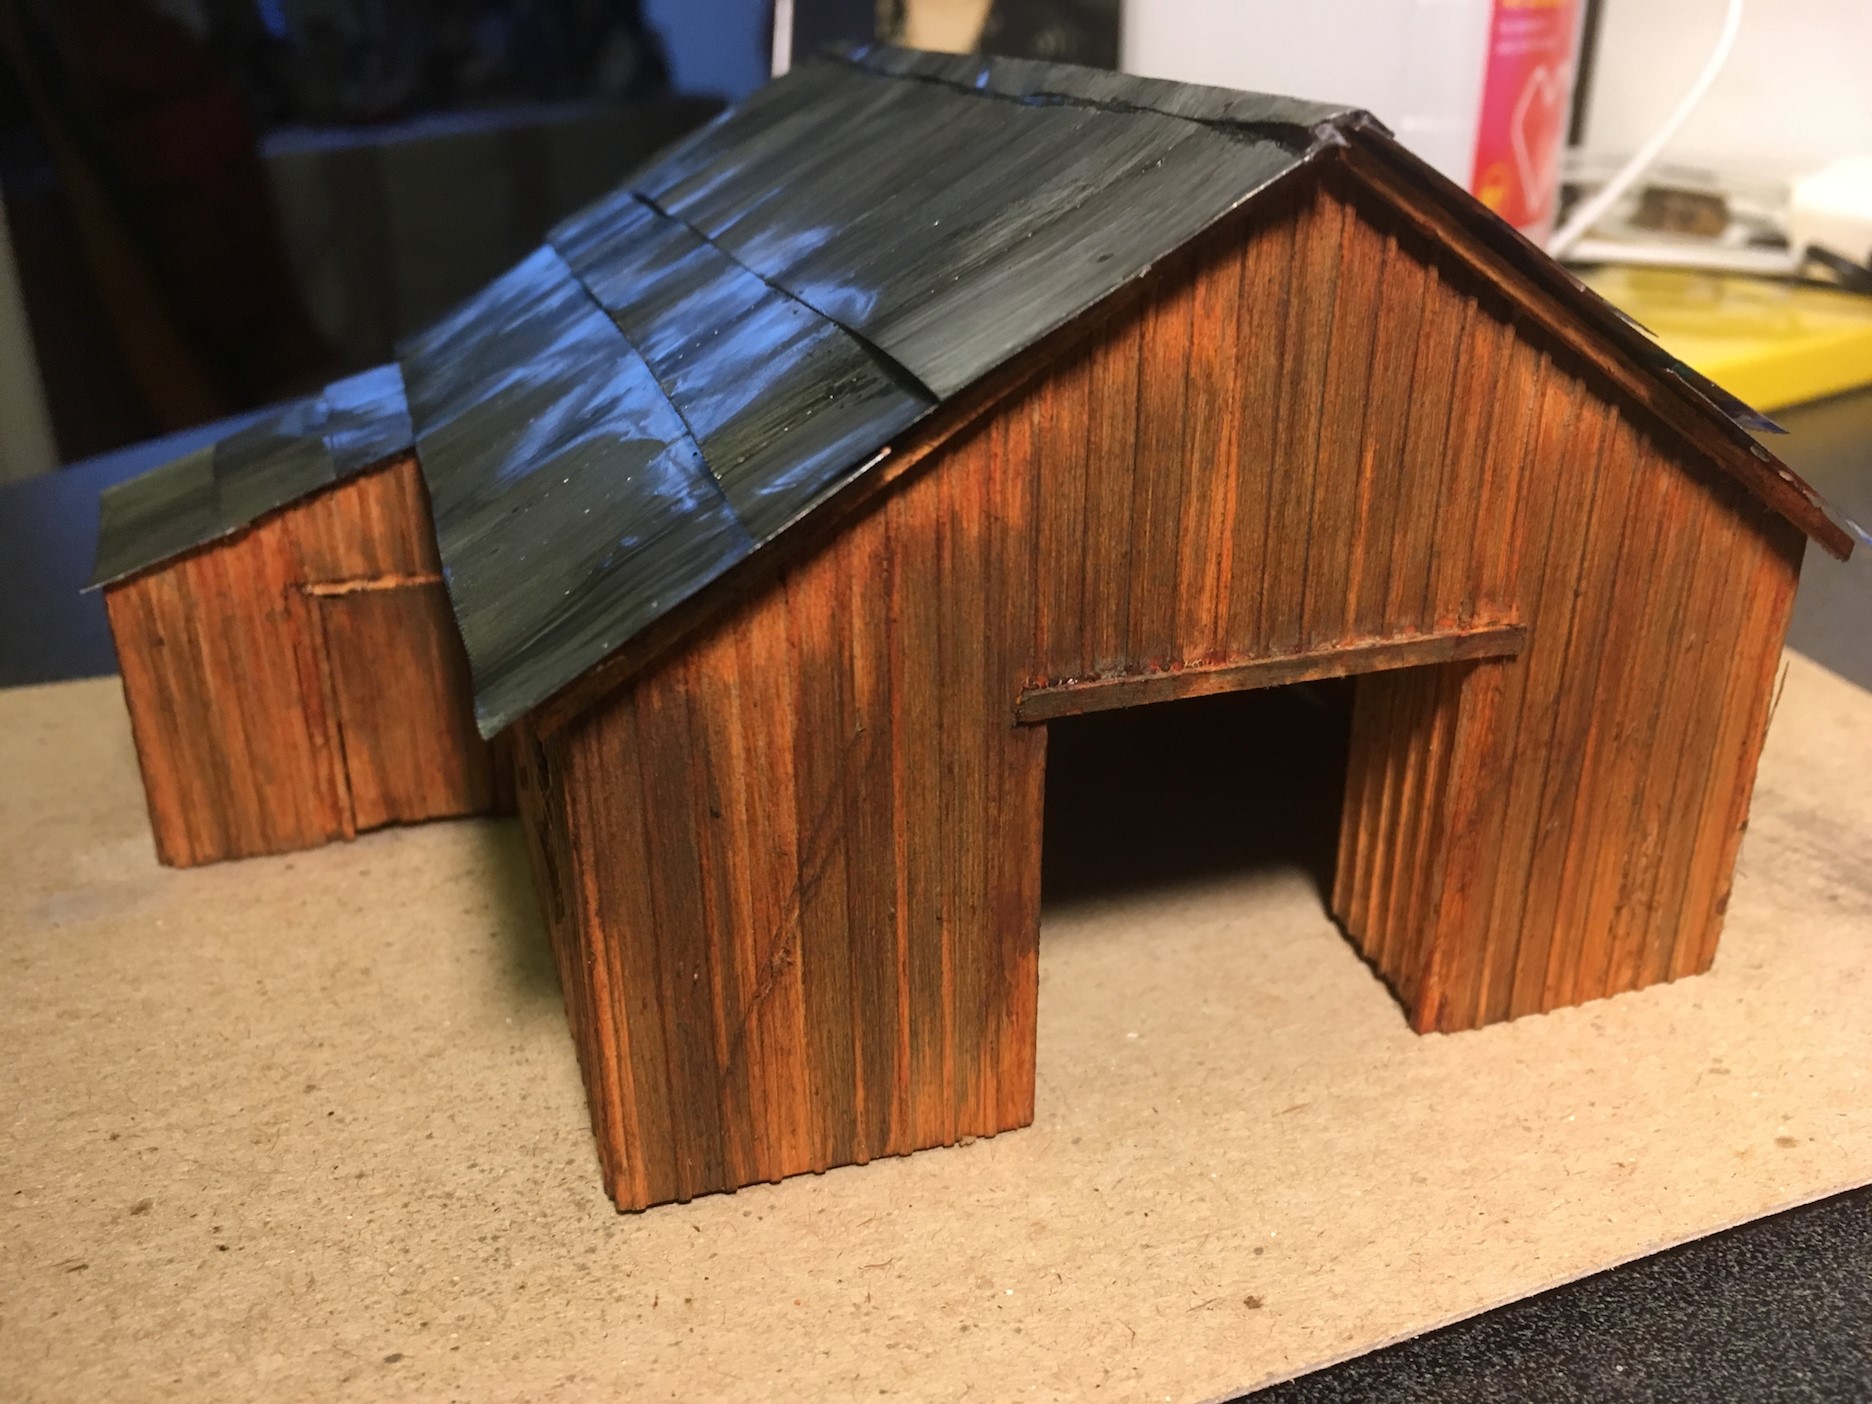
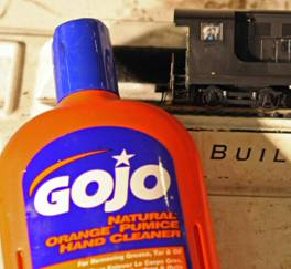
To make a metal roof seen in the photos of a barn I was building, I
took a soda can, cut off the round top and bottom and unfurled the
body, bending it and then weighing it down to flatten it. I used
normal scissors to cut strips of metal to create the individual roof
pieces. I then took a serrated sewer's tracer wheel to make markings
in the metal to simulate seams. (I realized this can also be used to
simulate nail holes in siding.)
After installing the roof, I brushed India ink wash over the metal
strips. I then sprayed the roof with Dullcote. Weather as you prefer
with paint, pastel or powder. (FYI The underside of the roof was
painted black to cover the imprinted imagery of the soda can
exterior.)
Annealing Brass Wire For Easy Bending — John
Paganoni
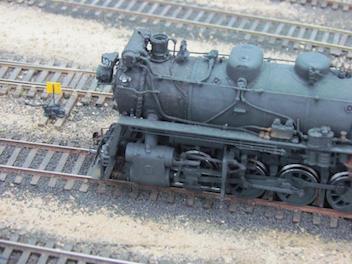
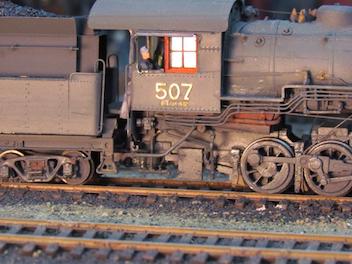
Brass wire right from the
package is usually quite rigid and therefore hard to bend into
tight curves. Try using an inexpensive gas cigarette lighter
(usually at grocery store checkout lanes) to anneal (take the
temper out) of the wire. DO NOT DO THIS ON THE WORK BENCH OR
NEAR ANYTHING THAT WILL BURN! Simply hold the wire with pliers
and run the lit lighter under the length of wire you want to
bend until it turns a dark blue-green color. Let it air cool
(dunking it in cold water may harden it again). Practice is
highly recommended! This procedure should make it easy to make
bends that retain the shape you need. Just remember, the
annealed brass "piping" can be easily bent during handling of
your model, so exercise care. The piping in the area around
the smoke box in the photo illustrates some unique challenges
in creating a prototypical model. The piping circling the top
of the smoke stack is unique in itself.


 like this has two advantages: one is that if you are working
on a fragile or delicate model, the foam provides a soft
cushion to set the model on, and 2.) when you do drop that
small part, there is a high likelihood it will fall into one
of the depressions in the foam and stay there.
like this has two advantages: one is that if you are working
on a fragile or delicate model, the foam provides a soft
cushion to set the model on, and 2.) when you do drop that
small part, there is a high likelihood it will fall into one
of the depressions in the foam and stay there. 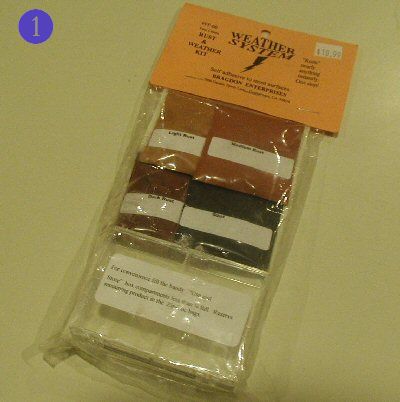
 There have been countless
articles written on weathering methods for rolling stock and structures,
with each method having its own degree of complexity or difficultly, and
each with its own results. I've tried many of these methods, and the one
I like most also turns out to be quick and easy and gives, what I think,
are excellent results. It is a set of weathering pastels from Bragdon
Enterprises (figure 1). I purchased mine at Mainline Hobbies in Blue
Ridge, PA, a short ride north of Frederick, MD. It cost around $11 for a
set of four different pastel colors. The set shown in figure 1 is the
rust-tone set, which consists of 4 different rust-tone shades, and a
plastic, divided container to hold the powders. They also make a
dust-tone set with various shades of gray pastels. "What is so
special about weathering pastels"? you might say. What is different
about these is that once you put these pastels on, you do not need to
set them with a flat overspray. They will adhere like a paint, and don't
come off in your hands.
There have been countless
articles written on weathering methods for rolling stock and structures,
with each method having its own degree of complexity or difficultly, and
each with its own results. I've tried many of these methods, and the one
I like most also turns out to be quick and easy and gives, what I think,
are excellent results. It is a set of weathering pastels from Bragdon
Enterprises (figure 1). I purchased mine at Mainline Hobbies in Blue
Ridge, PA, a short ride north of Frederick, MD. It cost around $11 for a
set of four different pastel colors. The set shown in figure 1 is the
rust-tone set, which consists of 4 different rust-tone shades, and a
plastic, divided container to hold the powders. They also make a
dust-tone set with various shades of gray pastels. "What is so
special about weathering pastels"? you might say. What is different
about these is that once you put these pastels on, you do not need to
set them with a flat overspray. They will adhere like a paint, and don't
come off in your hands.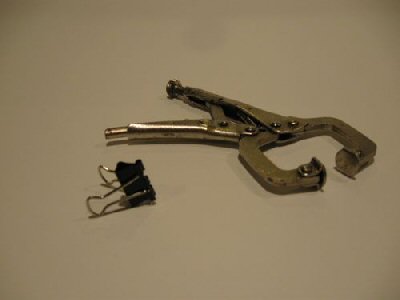
 I
have found numerous times that I need fairly heavy weights instead
of clamps to hold some some model pieces together while the glue
dries. Also, when you are gluing the walls on that
building you are making, you want to make sure they are at a 90
degree angle with the base. One way is to buy professional
modeler?s angle plates. However, these are fairly expensive (a 3"
x 3" x 3" plate in the latest Micromark catalog is $27.15 ). I
took a trip up to the local welding shop in our community and
found 5 pieces of about 5" x 5" angle iron cut in
about 3" lengths for which I paid a total of $10. I found a can of
Rustoleum Spray in my garage, and soon had 5 good-looking pieces
of metal that could be used for gluing weights or even angle
plates. I also have an assortment of small pieces of metal
bar stock I got at the welding shop that serve well as gluing
weights.
I
have found numerous times that I need fairly heavy weights instead
of clamps to hold some some model pieces together while the glue
dries. Also, when you are gluing the walls on that
building you are making, you want to make sure they are at a 90
degree angle with the base. One way is to buy professional
modeler?s angle plates. However, these are fairly expensive (a 3"
x 3" x 3" plate in the latest Micromark catalog is $27.15 ). I
took a trip up to the local welding shop in our community and
found 5 pieces of about 5" x 5" angle iron cut in
about 3" lengths for which I paid a total of $10. I found a can of
Rustoleum Spray in my garage, and soon had 5 good-looking pieces
of metal that could be used for gluing weights or even angle
plates. I also have an assortment of small pieces of metal
bar stock I got at the welding shop that serve well as gluing
weights. 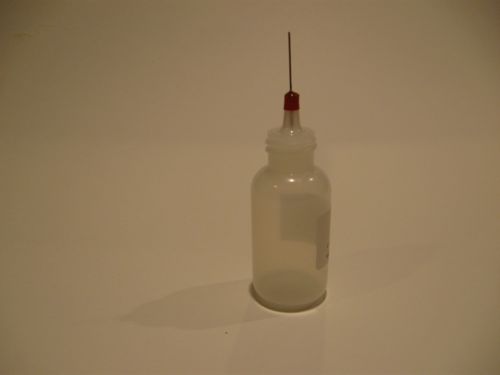
 During an operating
session, many of the "crew" will have a beverage with them.
The last thing you want is for them to put it on the layout while
they are busy switching a yard, or flipping turnouts to route their
through freight. One bump and you may kiss goodbye to some scenery,
a structure, or even short out the railroad. This holds true for me
too, when I am working on the layout. While there are many
commercial drink holders, those that are mounted to and stick out
from the front of the layout can be a problem. People will walk into
them or snag them when trying to pass a fellow operator in an
aisle. To eliminate this problem, there are drink holders made
for boaters that fold up out of the way when not in use. I purchased
mine at a local West Marine dealer. They cost about $10 each, so
they aren?t all that cheap. However, I find them well worth the
investment. When an operator finishes up his chores in one area of
the layout, and moves with his train to another area, he simply
grabs his can or bottle and flips the drink holder closed . When it
is closed it sticks out no more that about 1/2? from the front of
the layout and poses no hazard to traffic in the aisles.
During an operating
session, many of the "crew" will have a beverage with them.
The last thing you want is for them to put it on the layout while
they are busy switching a yard, or flipping turnouts to route their
through freight. One bump and you may kiss goodbye to some scenery,
a structure, or even short out the railroad. This holds true for me
too, when I am working on the layout. While there are many
commercial drink holders, those that are mounted to and stick out
from the front of the layout can be a problem. People will walk into
them or snag them when trying to pass a fellow operator in an
aisle. To eliminate this problem, there are drink holders made
for boaters that fold up out of the way when not in use. I purchased
mine at a local West Marine dealer. They cost about $10 each, so
they aren?t all that cheap. However, I find them well worth the
investment. When an operator finishes up his chores in one area of
the layout, and moves with his train to another area, he simply
grabs his can or bottle and flips the drink holder closed . When it
is closed it sticks out no more that about 1/2? from the front of
the layout and poses no hazard to traffic in the aisles. 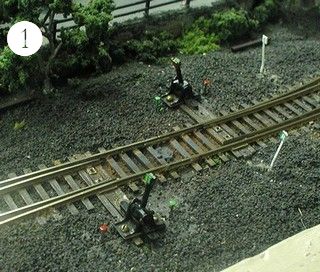
 During a layout visit at the MER
Convention in Princeton, NJ, I noticed a neat, simple way the layout
owner used to indicate turnout direction and also to grab the
throw bar for hand-thrown turnouts that use hand throws such as
those made by Caboose Industries.
During a layout visit at the MER
Convention in Princeton, NJ, I noticed a neat, simple way the layout
owner used to indicate turnout direction and also to grab the
throw bar for hand-thrown turnouts that use hand throws such as
those made by Caboose Industries. 
 With today's growing interest
in developing layouts for operation the need to manage
paperwork, car cards, and throttles have become a increasing
problem. Below are two solutions which will assist in
managing all this stuff.
With today's growing interest
in developing layouts for operation the need to manage
paperwork, car cards, and throttles have become a increasing
problem. Below are two solutions which will assist in
managing all this stuff.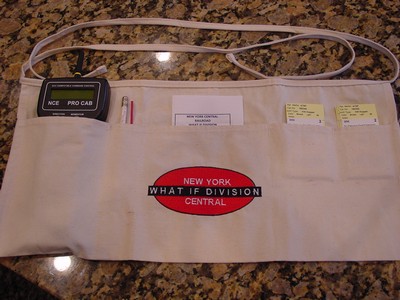 E-Shirts Plus has developed a
waist apron that can assist in handling those items. This
waist apron can be customized where by choosing a logo of your
choice. The apron is designed with pockets which will hold
your Throttle, Car Cards, Schedule, Pencils and Uncoupling
Tool. I have attached a picture of the apron. You
can contact E-shirts Plus at the following for more info
these aprons: de0147@comcast.net
E-Shirts Plus has developed a
waist apron that can assist in handling those items. This
waist apron can be customized where by choosing a logo of your
choice. The apron is designed with pockets which will hold
your Throttle, Car Cards, Schedule, Pencils and Uncoupling
Tool. I have attached a picture of the apron. You
can contact E-shirts Plus at the following for more info
these aprons: de0147@comcast.net
 A number of manufacturers make
a decoder that mounts on the motor frame of an Atlas HO
scale RS3 diesel. One of the more painful parts of the
installation is the headlights. The Atlas engines use a
piece of clear plastic to transmit the light from a circuit
board-mounted bulb to the headlights. This circuit board has
to be removed to mount the decoder. Also, the clear plastic
is custom-formed to fit around and under the shell weights.
Hence, to get directional headlights, one usually has to
resort to cutting the clear plastic, trying to glue lamps in
the shell so they fit under the shell weights and will still
transmit light to the headlights. The Atlas RS3 headlight is
actually two smaller headlights located side by side. I
found that Miniatronics 12V/30mA bulbs (Model
18-712-10) are tubular in shape, and the diameter is
approximately the diameter of the headlamp opening. Thus, I
was able to easily glue two of these bulbs in each end of
the shell (one per headlamp opening). They fit within the
opening of the shell weight so no modification to the shell
weight is needed. The wires are then connected in parallel
and soldered to the DCC decoder board.
A number of manufacturers make
a decoder that mounts on the motor frame of an Atlas HO
scale RS3 diesel. One of the more painful parts of the
installation is the headlights. The Atlas engines use a
piece of clear plastic to transmit the light from a circuit
board-mounted bulb to the headlights. This circuit board has
to be removed to mount the decoder. Also, the clear plastic
is custom-formed to fit around and under the shell weights.
Hence, to get directional headlights, one usually has to
resort to cutting the clear plastic, trying to glue lamps in
the shell so they fit under the shell weights and will still
transmit light to the headlights. The Atlas RS3 headlight is
actually two smaller headlights located side by side. I
found that Miniatronics 12V/30mA bulbs (Model
18-712-10) are tubular in shape, and the diameter is
approximately the diameter of the headlamp opening. Thus, I
was able to easily glue two of these bulbs in each end of
the shell (one per headlamp opening). They fit within the
opening of the shell weight so no modification to the shell
weight is needed. The wires are then connected in parallel
and soldered to the DCC decoder board.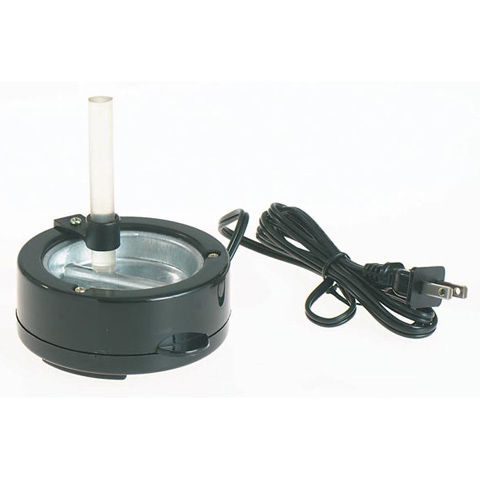
 As a model railroad hobbyist, I
was never satisfied using washes, paints and other methods to simulate
mortar joints on brick buildings. No matter what method I used or
saw never really defined the difference between the brick and mortar in a
way that represents a life like appearance.
As a model railroad hobbyist, I
was never satisfied using washes, paints and other methods to simulate
mortar joints on brick buildings. No matter what method I used or
saw never really defined the difference between the brick and mortar in a
way that represents a life like appearance.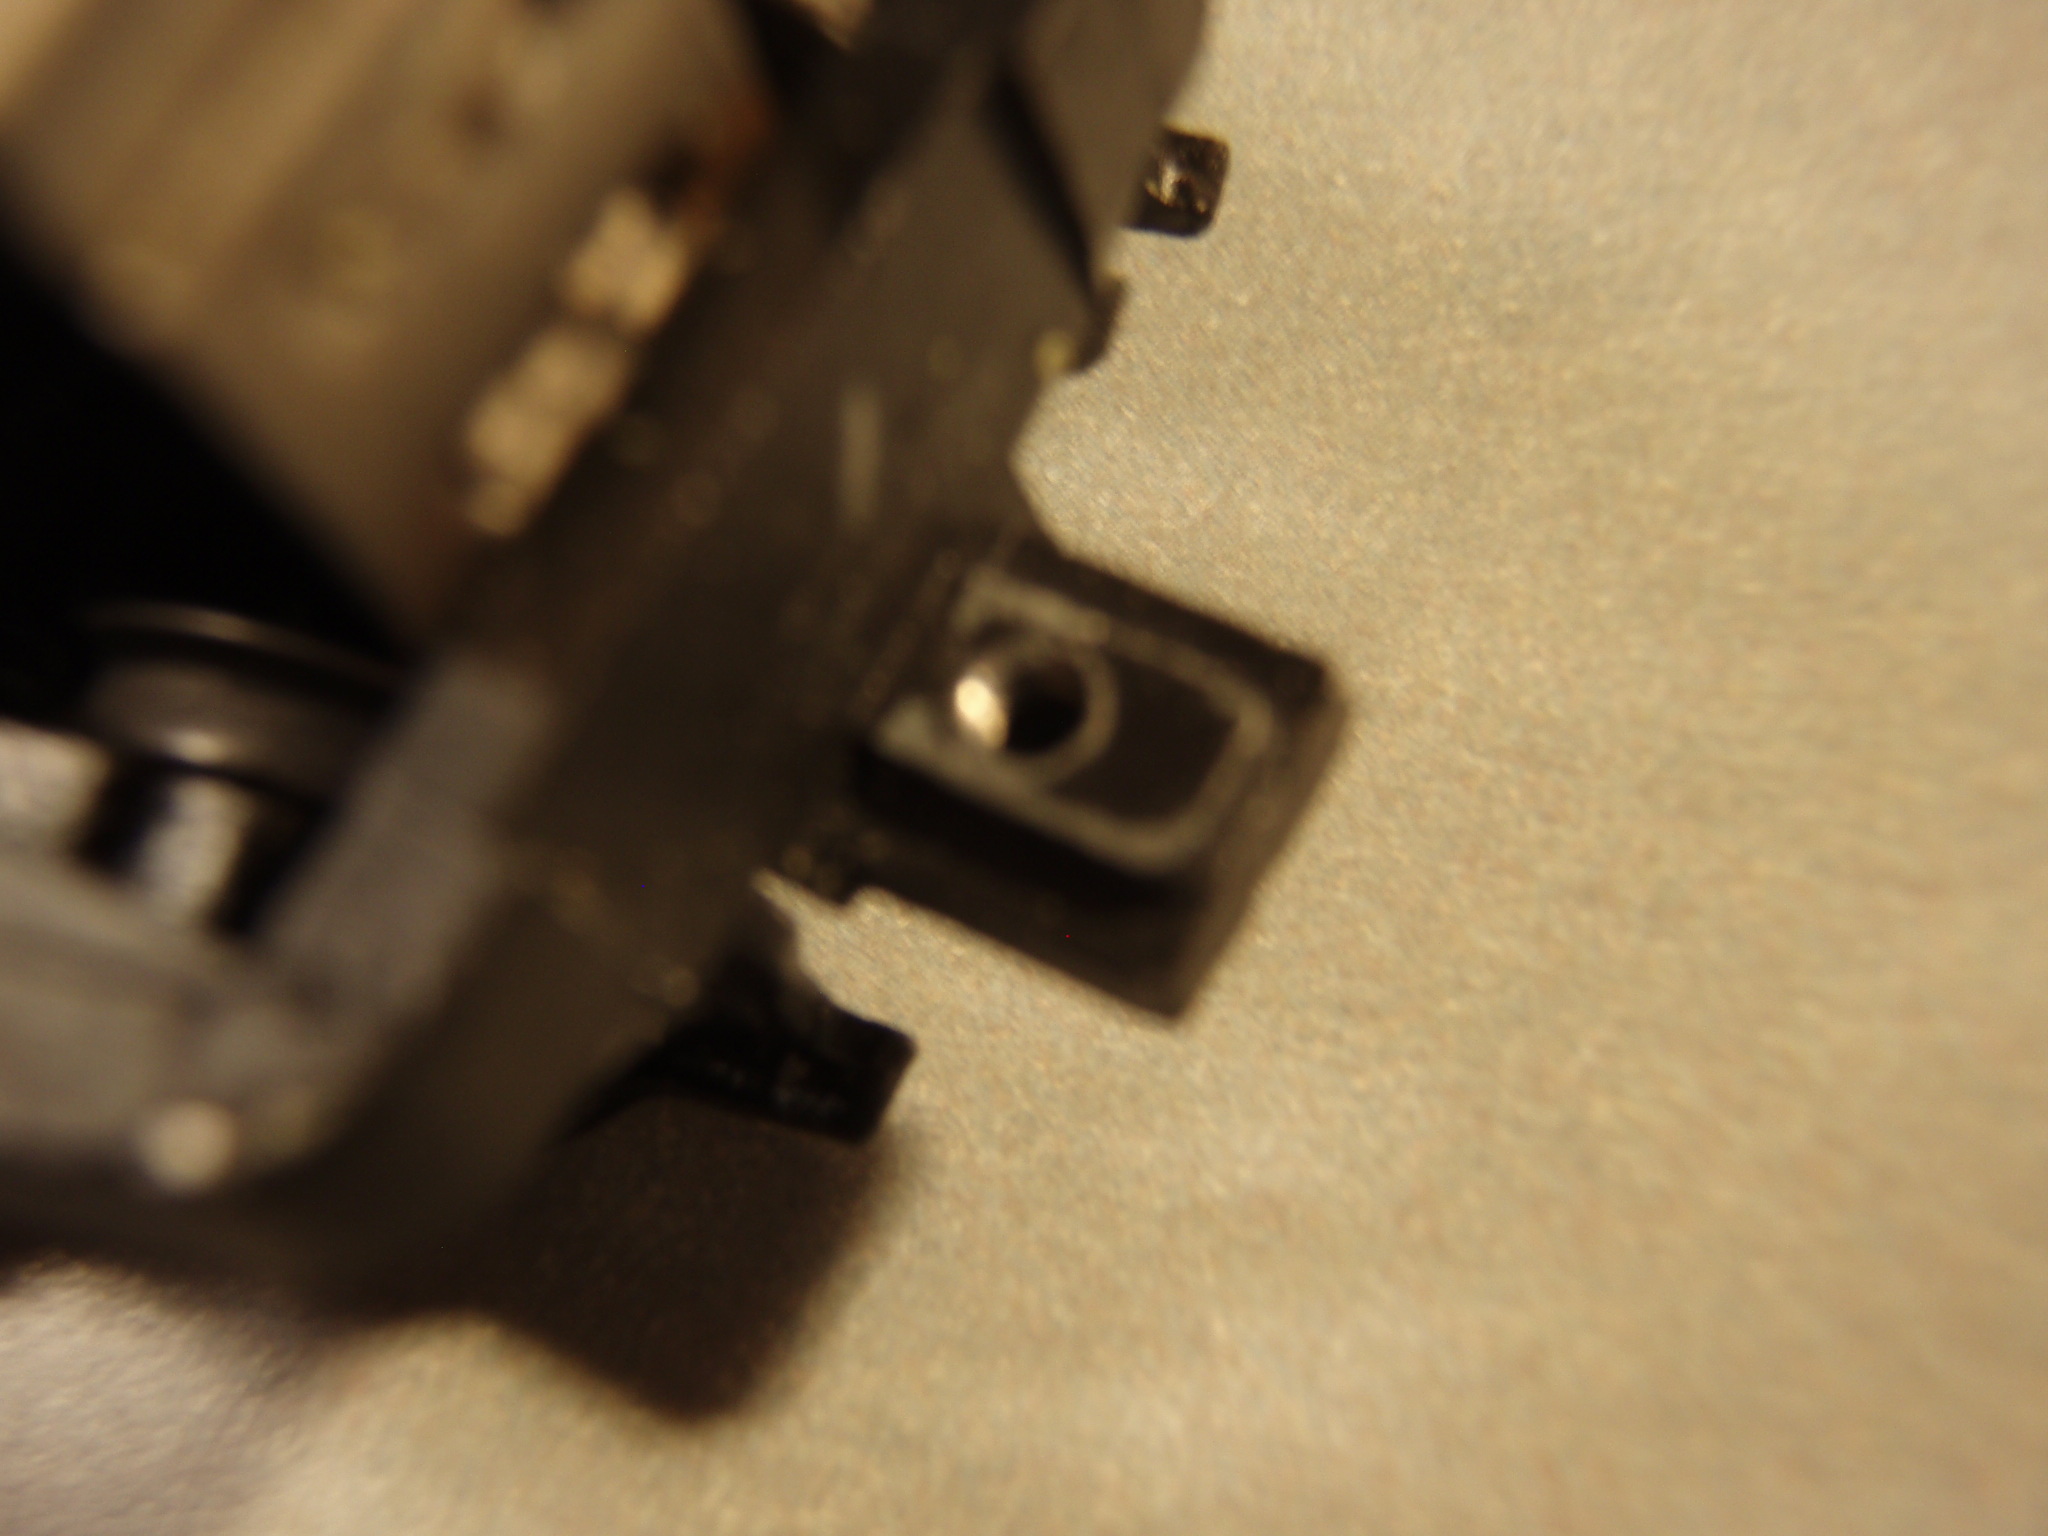 The first step is to drill and
tap the coupler tab for a 2-56 screw. Kadee offers a #246
2-56 Tap & Drill Set ideal for this purpose. Countersink
a drill starting point in the hole or dimple in the coupler tab. I use a
nail for this, I can never find my countersinks. Then, use the smaller
drill in the set to drill a hole through the tab. Finally, tap the hole
for a 2-56 screw using the provided tap. Work slowly, use oil, and clean
the tap regularly. Repeat on the coupler tab on the other end of the
locomotive.
The first step is to drill and
tap the coupler tab for a 2-56 screw. Kadee offers a #246
2-56 Tap & Drill Set ideal for this purpose. Countersink
a drill starting point in the hole or dimple in the coupler tab. I use a
nail for this, I can never find my countersinks. Then, use the smaller
drill in the set to drill a hole through the tab. Finally, tap the hole
for a 2-56 screw using the provided tap. Work slowly, use oil, and clean
the tap regularly. Repeat on the coupler tab on the other end of the
locomotive. 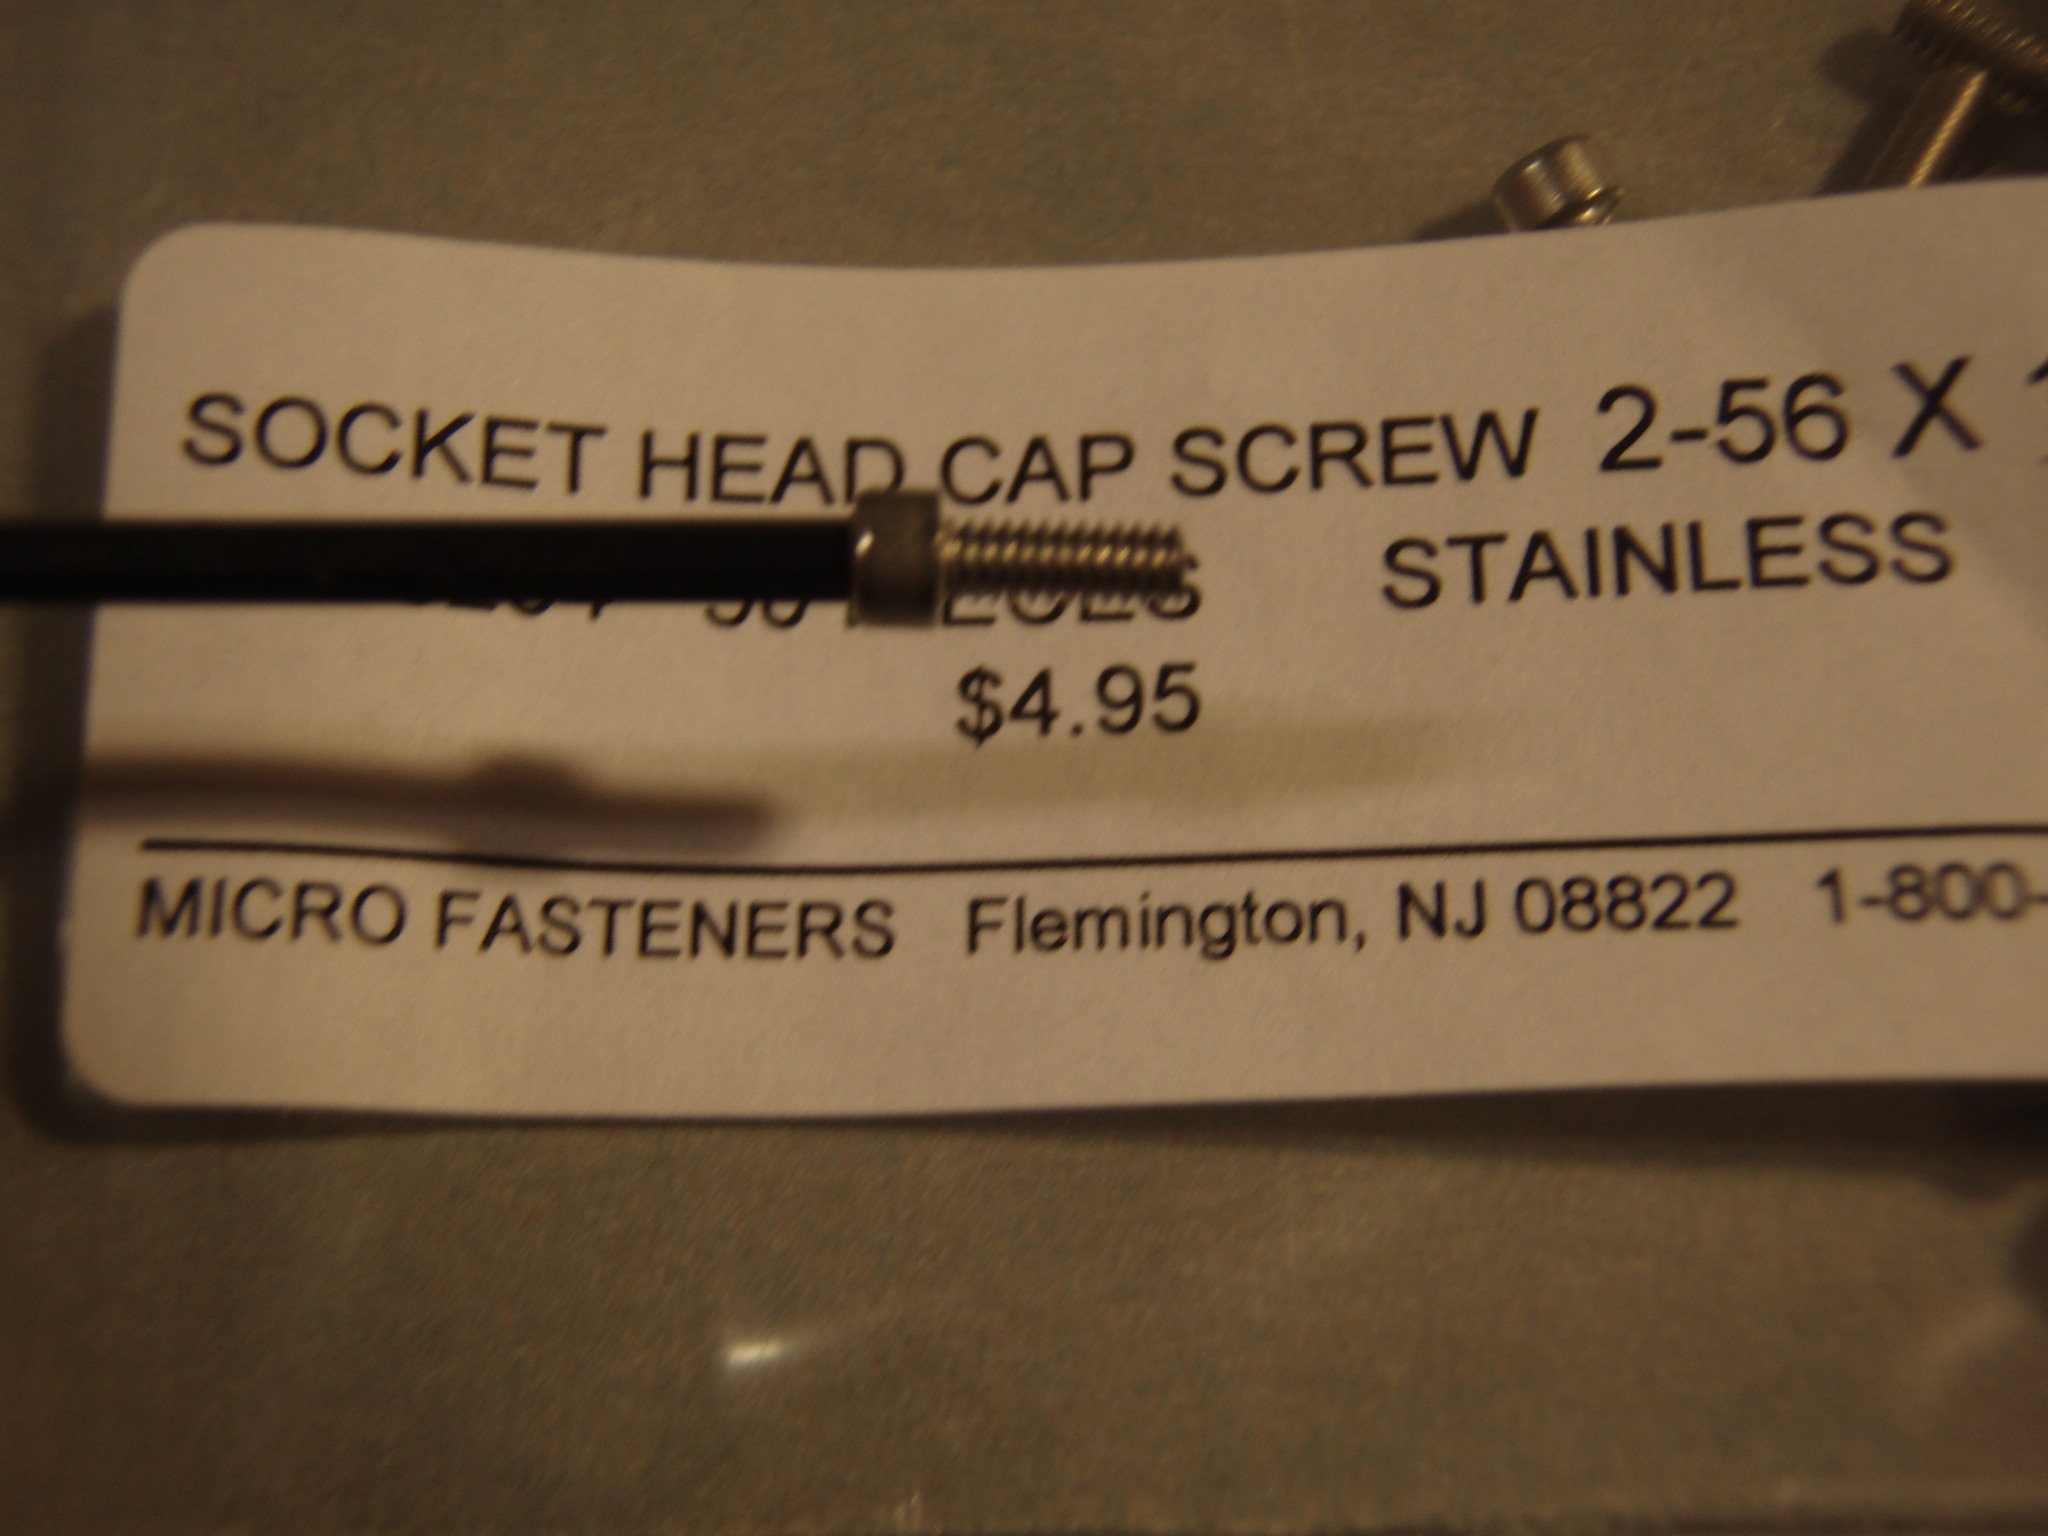
 it's harder to mar a
paint finish with an Allen than with either a blade or Phillips
screwdriver, and (b) you can hold the Allen screw on the tool one-handed.
I was sold!
it's harder to mar a
paint finish with an Allen than with either a blade or Phillips
screwdriver, and (b) you can hold the Allen screw on the tool one-handed.
I was sold!  size of a coffee cup, have a handle,
and a screw-on top with 100 or so 1/16" inch holes. If you can't find
shakers like that, drill 1/16" holes in the lid of any jar that size—a
cluster of 15 or 20 holes over on one edge will be enough.
size of a coffee cup, have a handle,
and a screw-on top with 100 or so 1/16" inch holes. If you can't find
shakers like that, drill 1/16" holes in the lid of any jar that size—a
cluster of 15 or 20 holes over on one edge will be enough. 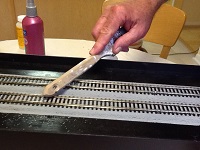
 • 50-50 diluted Elmer's is
adequate for gluing the ballast, and adding some alcohol and detergent
to it helps.
• 50-50 diluted Elmer's is
adequate for gluing the ballast, and adding some alcohol and detergent
to it helps. 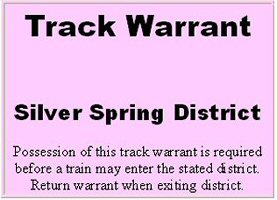
 Campbell shingles look great on model structures either as roofing or
siding; however, when you break the package open, the roll of shingles is
hard to keep organized and when the job is done re-rolling those things is
a hassle. A holder with a reel can save a lot of time and frustration when
cutting lengths of shingles and then having a way to neatly put them away
until the next time they are needed. The picture shows the parts needed to
make a tool that can be clamped to the edge of the workbench. The main
item is a reel from an old tape recorder. This one held the entire
Campbell shingle roll neatly. The bolt, washers and nuts serve as an axle
for the reel. The aluminum angle stock (the one shown is 1 1/2" stock,
1/8" thick, 5" long) was drilled for a 1/4" bolt and attached directly to
the workbench. A longer piece would be necessary for just clamping to the
bench.
Campbell shingles look great on model structures either as roofing or
siding; however, when you break the package open, the roll of shingles is
hard to keep organized and when the job is done re-rolling those things is
a hassle. A holder with a reel can save a lot of time and frustration when
cutting lengths of shingles and then having a way to neatly put them away
until the next time they are needed. The picture shows the parts needed to
make a tool that can be clamped to the edge of the workbench. The main
item is a reel from an old tape recorder. This one held the entire
Campbell shingle roll neatly. The bolt, washers and nuts serve as an axle
for the reel. The aluminum angle stock (the one shown is 1 1/2" stock,
1/8" thick, 5" long) was drilled for a 1/4" bolt and attached directly to
the workbench. A longer piece would be necessary for just clamping to the
bench.